There is nothing quite like waking up on a chilly morning and enjoying a hot cup of camp coffee before the rest of the world wakes up. My favourite moments are when everything is still and quiet - when everyone is still tucked away in their tents, sound asleep.
Hardcore coffee lovers have their coffee rituals - even at camp.
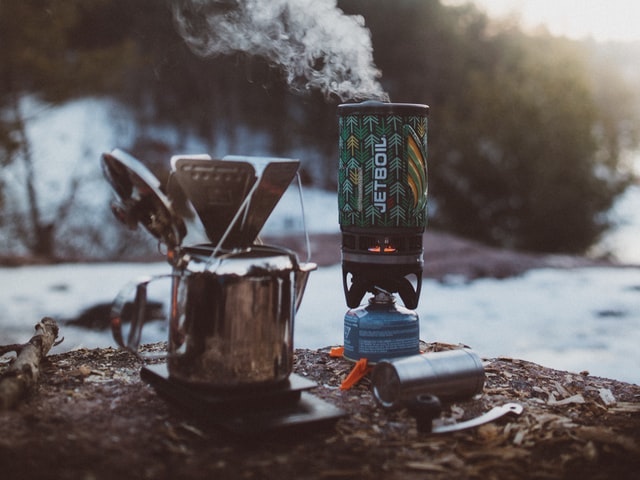
I light the camp stove and get the water boiling. I get my pour-over coffee dripper prepped with my favourite dark roast. I dig out my camp mug. When the water is hot, I preheat my mug with hot water and toss it aside. I top my mug with my coffee dripper - I slowly pour the hot water over the coffee grounds and wait for it to drip through.
With my coffee in hand, I find a quiet spot with a good view to enjoy the stillness of the morning.
Mmmmm ... magic.
The Secret to Great Coffee
Every great cup of coffee starts with the basics. Whether it's at home or camp, the same rules apply.
Choose quality coffee. Your coffee is only going to be as good as the beans you start with. Choose fresh, quality coffee.
Grind your own beans. Before heading out to camp, I like to grind my beans and pack them in an airtight container. Figure out the right grind for your brew method. Too fine, and your coffee will be bitter; too coarse, and it will taste flat.
Your water should be at the right temperature. For methods like the pour-over, AeroPress or French press, let the water come just to a boil and remove it from the heat. Let it cool for about a minute before using.
Use the right ratio. You should be using about 1 to 2 tablespoons of ground coffee for every 6 ounces of water. The coffee-to-water ratio should fall somewhere around 1:16.
Coffee Brew Systems
There are many different ways to make coffee. Some of them work better when car camping, and some are better for backpacking. Wherever your adventures take you, there is always a way to have a kick-ass cup of camp coffee.
Cowboy Coffee
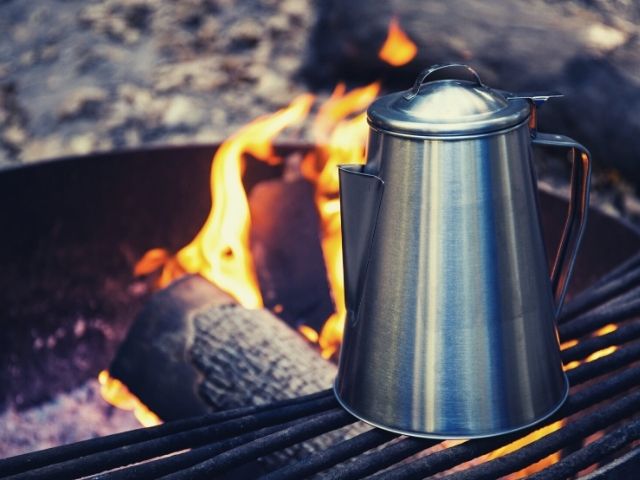
To make cowboy coffee, you need a pot and a heat source. This method can work well on an open fire.
Fill your pot with enough water for the amount of coffee you want, and bring it to a boil. Add your ground coffee to the water and stir with a long-handled spoon. Let it simmer for a few minutes to extract the flavours of the coffee. Take the pot off the heat and let it sit until the grounds settle to the bottom.
Adding a few spoons of cold water to the pot will help settle the grounds. One downside of this method is that clean-up can be messy.
Percolator
A coffee percolator is a classic method for making camp coffee. It works great in an open fire or on a camp stove. With a large percolator, you can make a lot of coffee. If I'm cooking outdoors for a group of adults, this is my go-to method.
Add your water to the pot and fill the basket with ground coffee. Drop the basket into the percolator. Place the percolator on high heat until the water comes to a boil. Move the percolator to the side of the campfire or lower the heat if using a camp stove. Let the coffee simmer on low heat for five to ten minutes or until the coffee is as strong as you like. The longer you let the coffee percolate, the stronger it will get.
Be careful when pouring the coffee as the percolator will be hot.

The Pour-Over
The pour-over is my everyday coffee brewing method at home and at camp. It’s easy, reliable, and makes a fine cup of coffee.
Start the pour by letting your coffee bloom. Pour a small amount of hot water on the coffee grounds until they are saturated. Let the coffee sit and gas off for 30 - 45 seconds.
After the bloom, pour hot water over the grounds in a circular motion. Stir the coffee to ensure the coffee grounds are evenly saturated and you achieve maximum extraction.
Moka Pot
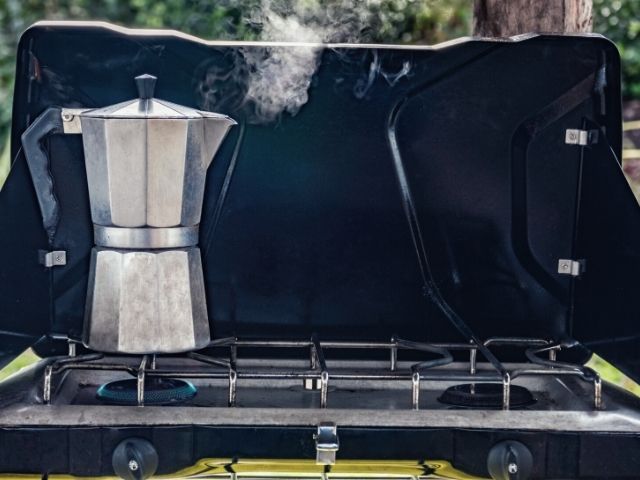
This stove-top coffee maker heats water in its lower chamber and brews the coffee by forcing water up through the grounds and into the upper chamber. It's one of my favourite ways to make coffee, and I’ve had many cups at camp this way.
This method works well on a camp stove or backpacking stove. Fill the water in the lower chamber just below the pressure relief valve. The trick is not to pack the ground in tightly. The Moka pot brews a rich, full-bodied cup of coffee.

French Press
I love using my French press for car camping when I need to make coffee for more than one person, but not more than two. Use a medium to large size grind. Add your grounds, and then pour hot water into the pot and stir. Allow it to sit for 3 - 4 minutes before using the plunger to separate the grounds from the coffee.
AeroPress
AeroPress is a cult classic among campers. And for a good reason. It brews a fantastic cup of coffee, and it’s small enough to fit in your backpack. Drink it strong, or add hot water to make an Americano.
To use the AeroPress, put the filter in the filter cap and twist the cap onto the chamber. Add your coffee to the chamber. Place your AeroPress over your mug, and add your hot water. Stir the coffee and wait for ten seconds. Insert the plunger and press down gently, pausing when you feel resistance.
One of my favourite things about the AeroPress is how easy it is to clean up. Just pop out the puck of used coffee grounds, give the seal and the chamber a quick rinse, and you're good to go.
Instant Coffee
As someone who appreciates good coffee, I think of instant coffee as a last resort. The only place I keep instant coffee is in my emergency kit in the car. I know many other campers would disagree, taking convenience over quality.
The plus side is its portability and easy clean-up, making it a good choice when time or space is limited.
But I personally think there are better ways to make a cup of coffee.
Heat Sources
You can't make a hot cup of coffee without hot water. The kind of adventure you're on will dictate which stove you can take with you.
Open Fire
At six am, I'm not usually in the mood to wait for my coffee. It can take some time to start a fire and for it to get hot enough to boil water. If you're not in a rush or you’re brewing your afternoon cup, making coffee over an open fire is quite enjoyable—just not first thing in the morning unless someone else is up before you to get the fire going.
Car Camping Stoves
Ahhh, the good ol' classic, the Coleman Camp Stove. This is the go-to when car camping. It's reliable, and it’s a luxury to cook with two burners at camp.
I like to use a kettle when I boil my water on the camp stove, and only boil as much water as I need, so I'm not waiting too long.
Pro tip: after I make my coffee, I throw a large pot of water on the stove. By the time I'm ready to make breakfast, there is enough hot water for hand washing and doing dishes. But coffee always comes first.
Backpacking Stoves
Small backpacking stoves like the MSR PocketRocket are lightweight and efficient. They are a great way to make a cup of coffee on the go. My PocketRocket has been on many adventures and never disappoints. Backpacking stoves are lightweight, easy to pack and can boil a litre of water in under 4 minutes.
One drawback is that they can be a challenge to use in cold or windy temperatures.
High-Efficiency Cook Systems
Specialty products like the JetBoil Personal Cooking System or MSR Reactor are designed to boil water quickly.
These amazing little workhorses can have a cup of hot coffee in your hand in just a few minutes. They are designed to work in harsh conditions like extreme cold and wind. And they are incredibly efficient on fuel.
They come in at a higher price point, but if backpacking or winter camping is on your bucket list, they are well worth the investment.

Now Kick Back and Enjoy Your Coffee
There are many ways to make coffee at camp - find the way that best suits your adventure style. And now that you’ve got the perfect cup of coffee, find a quiet spot with a great view and enjoy.

